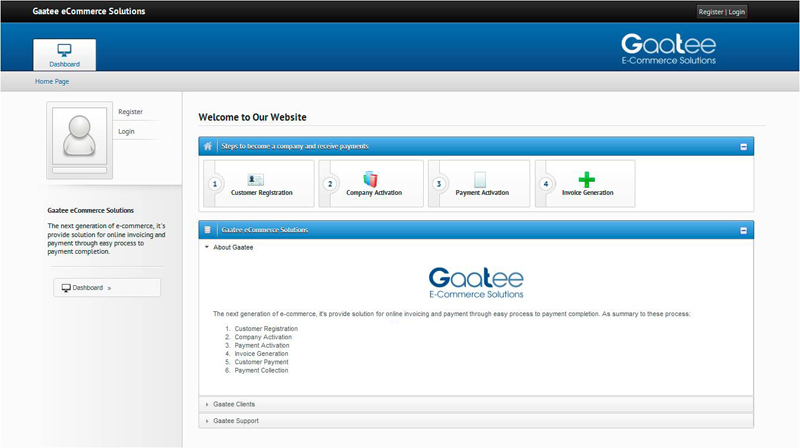
الواجهة الرئيسية لبوابة خدمات الدفع الإلكتروني
Homepage for e-payment gateway services
![]()
الواجهة الرئيسية لبوابة خدمات الدفع الإلكتروني
Homepage for e-payment gateway services
![]()
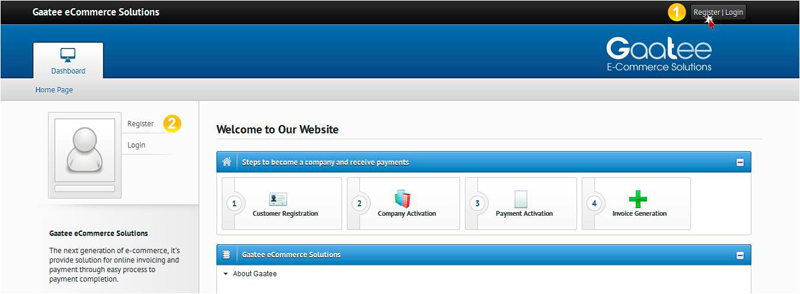
يمكنك التسجيل من خلال الضغط على أحد الموضعين المشار لهم في الصورة التوضيحية وملئ البيانات كما هو مبين في الخطوة التالية.
You can register by clicking on one of two marker referred to them in the photo caption and fill in the data as shown in the next step.
![]()
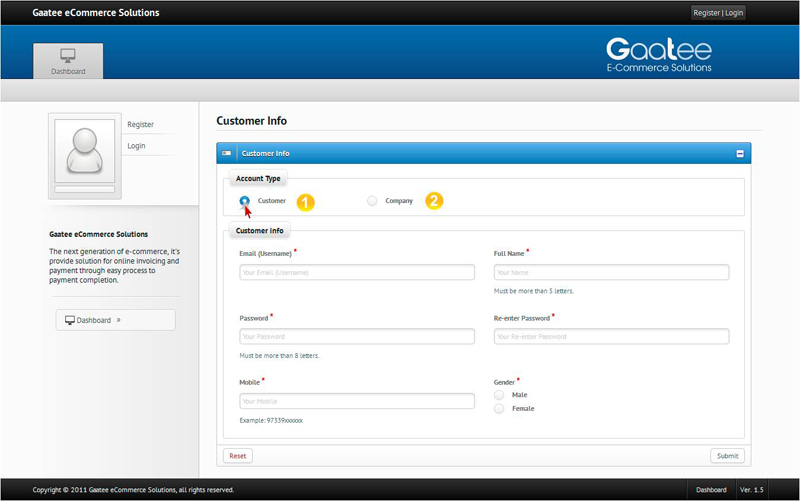
إستمارة التسجيل تنقسم إلى قسمين
اساسين وهما:
Registration form is divided into
two main sections, namely:
![]()
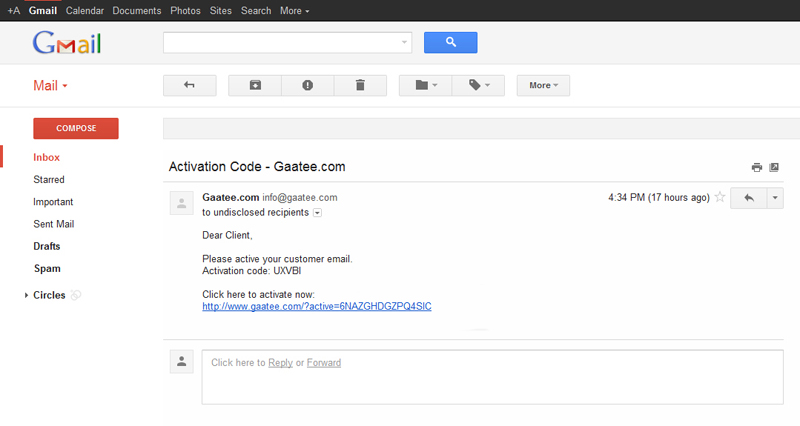
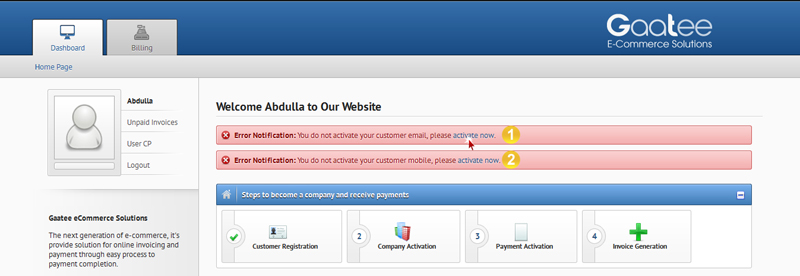
بعد ملئ إستمارة التسجيل ستتلقى على بريدك الإلكتروني وهاتفك النقال نسخة من كود التفعيل الخاص بكل منهما ولإستكمال عملية التسجيل يمكنك ادخال الكود التفعيل في المكان المخصص له او استخدم الوصلة المباشرة.
After filling the registration form you will receive on your email and your mobile phone a copy of the activation code for each of them, and to complete the registration process you can enter the activation code in place that allocated for or use the direct link.

![]()
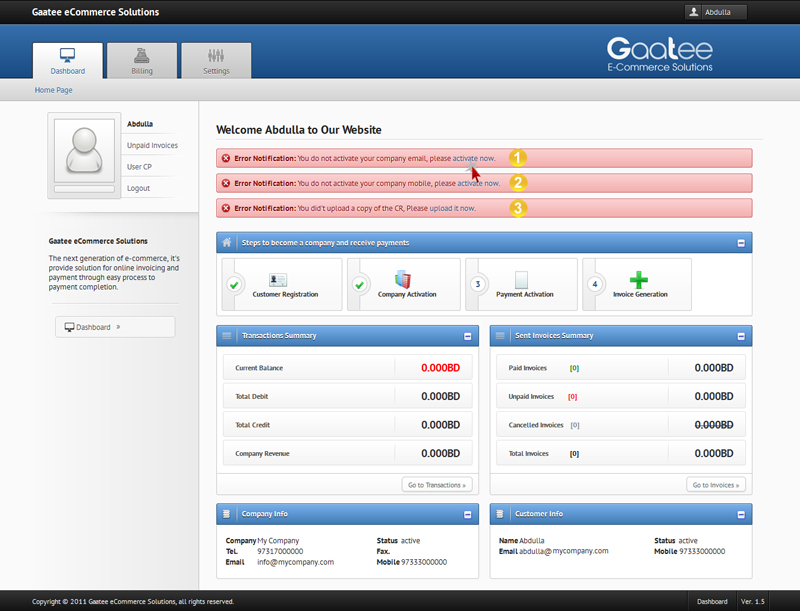
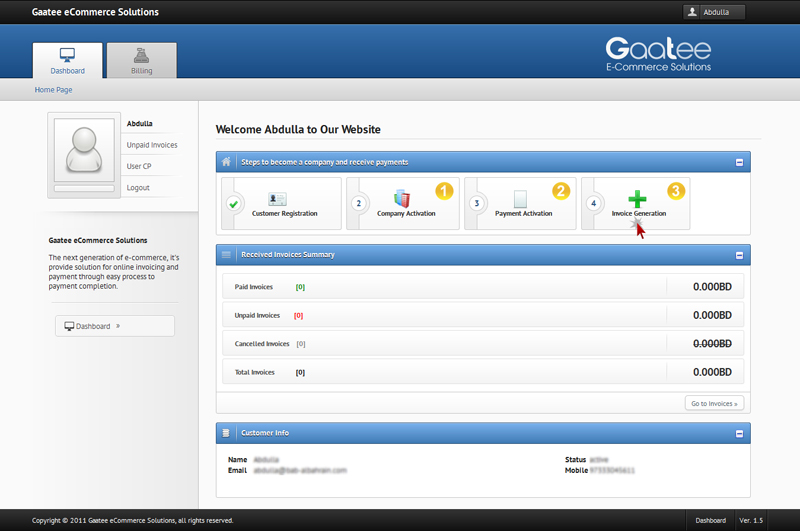
بعد استكمال عملية التسجيل، يمكنك تفعيل شركتك والذي يتح لك صلاحيات موسعة في استخدام النظام والتي تتلخص في يوفر صلاحية أنشاء وتحرير الفواتير وارسالها للعملاء واستحقاق مبالغها والإطلاع على ارشيف الفواتير الصادرة المدفوع منها وغير المدفوع.
After completing the registration process, you can activation of your company and then you will get expanded permissions in the use of the system. Which will provide you the authority to create and edit invoices and send them to the customers also get due amounts and see the archive of the invoices paid and unpaid.
![]()
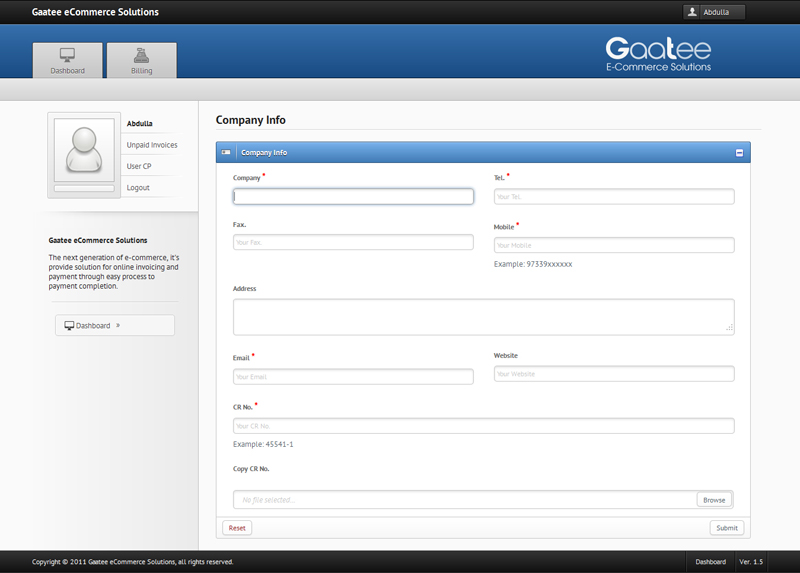
تفعيل الشركة من خلال ملئ الإستمارة وأستكمال عملية التفعيل:
The company activation by filling the form to complete the activation process:

![]()
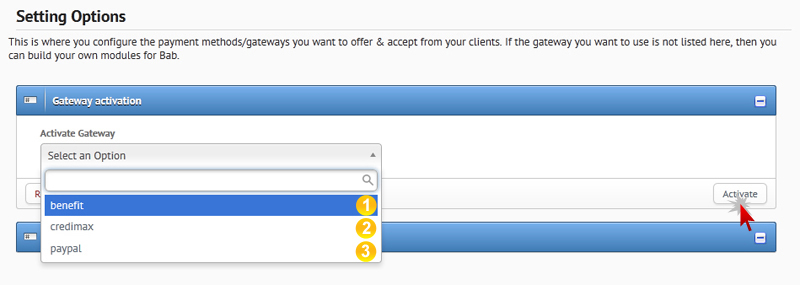
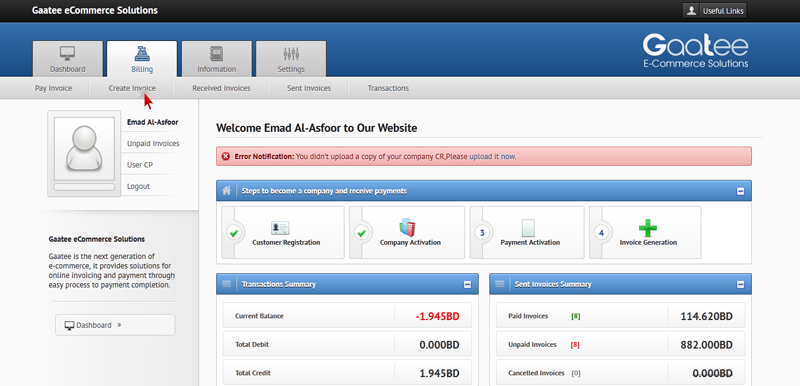
الخيار # (2) الموضح في الصورة التوضيحية يمكنك من خلاله تفعيل بوابات الدفع، كما في الصورة التوضيحية التالية يمكنك تفعيل بوابات الدفع.
Option # (2) shown in the illustration where you can activate payment gateways, as in the next illustration you can activate the payment gateways.
![]()
الخيار # (3) يمكنك من خلاله إنشاء فواتيرك الخاصة وإرسالها لعملائك.
Option # (3) where you can create your invoices and send them to your customers.

![]()
الصورة التوضيحية الأولى تبين طريقة إنشاء الفاتورة من القائمة الرئيسية، والصورة التوضيحية التي تليها توضح تحرير الفاتورة، وهي تنقسم إلى 3 اقسام:
وبعد اتمام عملية إدخال المعلومات الإساسية لإنشاء الفاتورة يمكنك إرسال الفاتورة للعميل من خلال البريد الإلكتروني أو الموبايل وبعد تلقيه المعلومات الخاصة بالفاتورة يمكنه دفع المبالغ المستحقة.
The first illustration shows how to create invoice from main menu, and the next illustration show edit invoices that are divided into 3 sections:

![]()
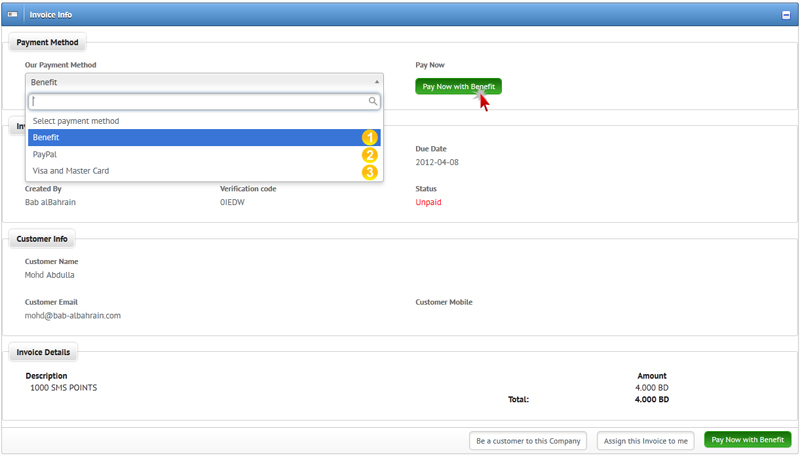
الصورة التوضيحية الأولى تبين الرسالة المرسلة إلى الزبون وبها رابط الفاتورة، وعليه الضغط على الرابط لعرض الفاتورة ومن ثم دفعها او دخوله على النظام وإدخال رقم الفاتورة وكود التحقق لها من القائمة الجانبية "Pay invoice"، والصورة التوضيحية التي تليها توضح عملية الدفع وهي تنقسم إلى خطوتين:
من ثم عليك متابعة وإكمال عملية الدفع في البوابة التي إخترتها وإضافة البيانات اللازمة لذلك، وبعد إتمام عملية الدفع سوف تقوم بوابة الدفع بتحويلك إلى النظام ليتمكن من تسجيل عملية الدفع التي قمت بها، وتغيير حالة الفاتورة إلى مدفوعة بعد إتمام العملية بنجاح.
The first illustration shows the message sent to the customer, that contain a invoice link, and he should be click on the link to view the invoice and then pay it or go to the system and enter the invoice number and verification code it from the left menu "Pay invoice", and the next illustration show the payment process is divided into two steps:
Then you follow up and complete the payment process in the gateway that you are selected and enter required data , and after completion of the payment process, the payment gateway will refer you to the system to be able to record the payment that you have made, and change the status of the invoice to paid after completing the process successfully.